How to make Pretty Tassels
How to Make a Tassel

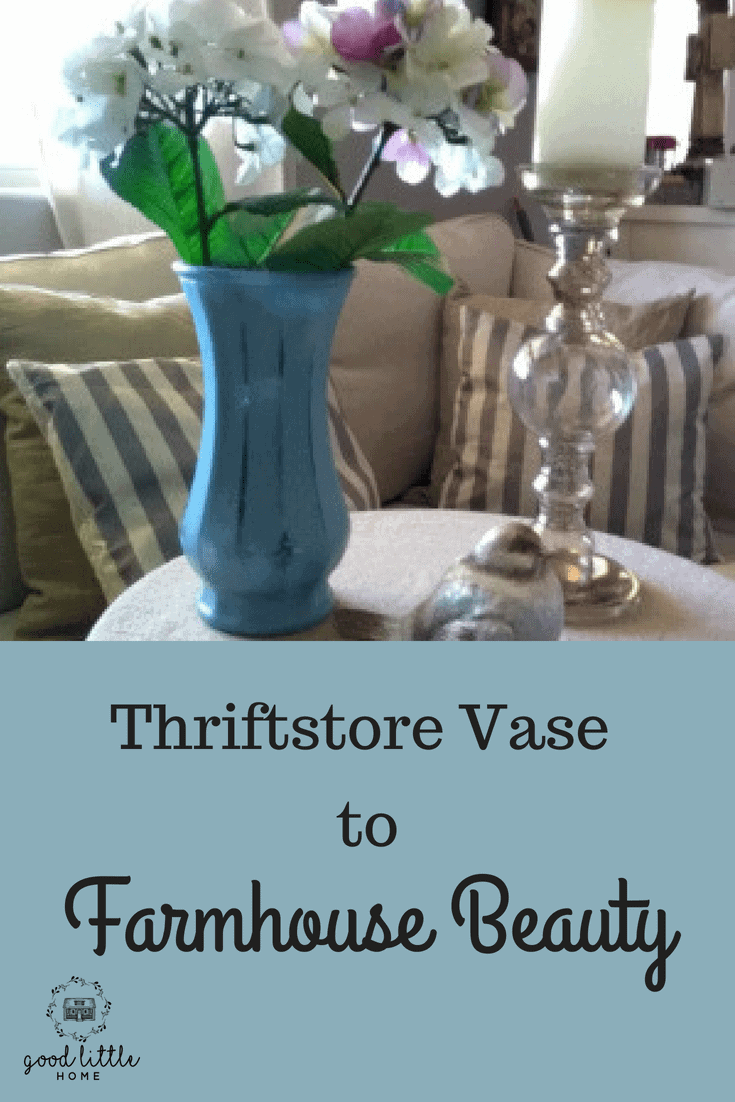
Do you know how to make tassels? They are so pretty and can really dress up a plain piece of decor. I almost didn’t write this post because I looked at tassels and thought there just can’t be that much to making them. There really isn’t. After I made a few I figured out a few tricks that make the job so much easier. But warning this little craft is addictive. It’s one of those things that you can do pretty much mindlessly after you have made a few. So while watching your favorite show you can make pretty tassels.
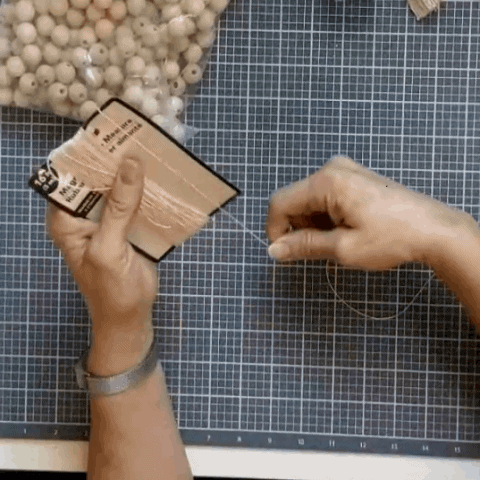
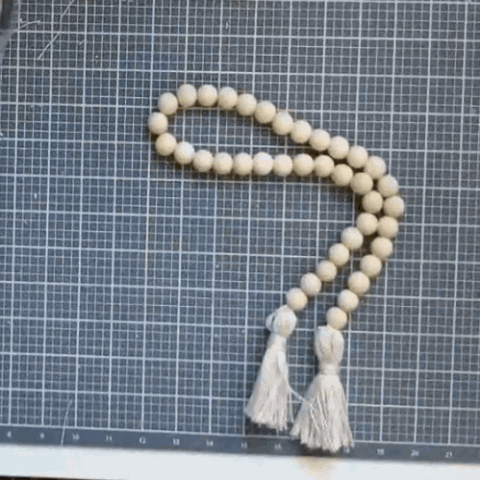
The video tutorial also shows how to make the wood bead garland.
I used #10 crochet thread to make these in the pictures, but you could use anything you wanted, jute, yarn, hemp cord, whatever gives you the look you are going for from farmhouse to elegant. The number 10 was pretty thin, so I have ordered some number 3 which should be thicker. Yup it’s one of those goofy things where bigger is smaller.
Materials
Cardboard
Crochet Thread or whatever you want to use.
Tools:
Sharp Scissors, these are the ones I use.
Step 1
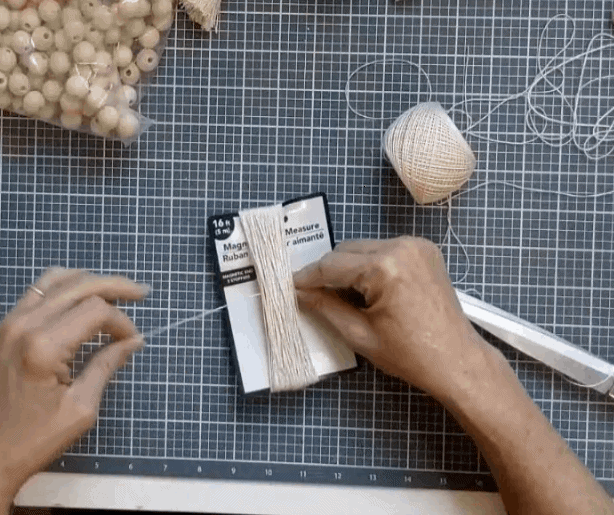
Figure out how long you want your tassel to be. Cut a piece of heavy cardboard to the length plus about an extra 2 inches. I happened to have a piece that I could use laying in front of me, so I grabbed it. Otherwise, I would have had to cut a piece of cardboard. You can see what I used in the next picture.
Step 2
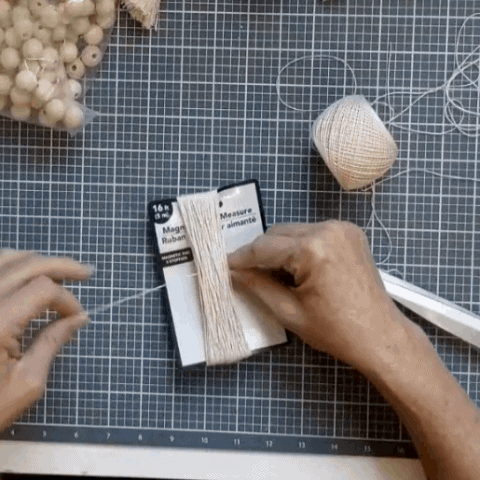
Wrap your material (twine, yarn, etc.) around the cardboard. how many times you go around depends on how full you want your tassel to be, and how thick your material is. In my example, I went around(and around, and around) 150 times.
Step 3
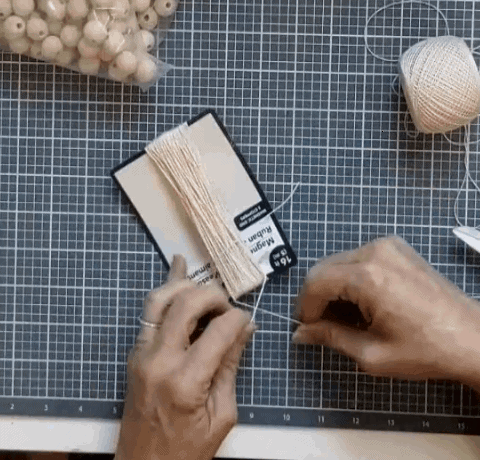
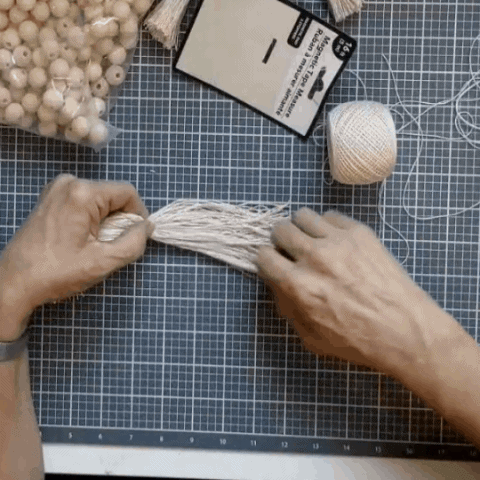
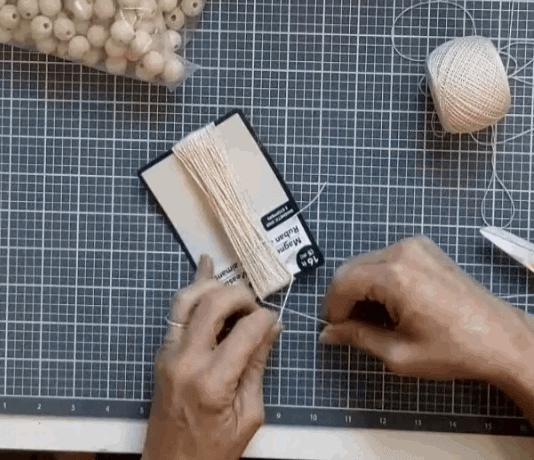
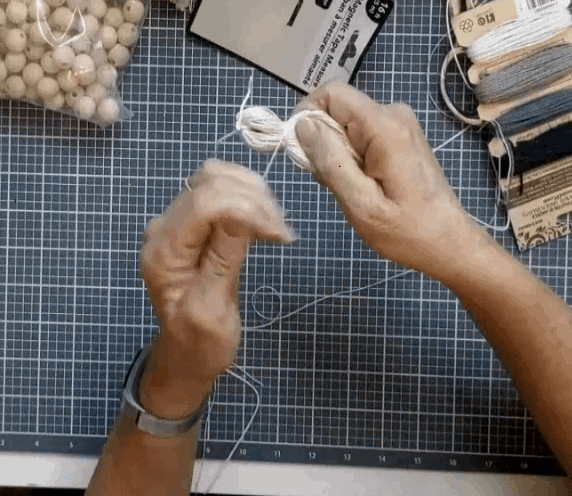
Cut a piece of the material to about 8 inches. This will end up being your hanger. Slide the piece under the twine and slide it to the very top at the center of the loops. Now tie a tight knot around the loops. This piece is going to be your hanger when you are all done.
Step 4
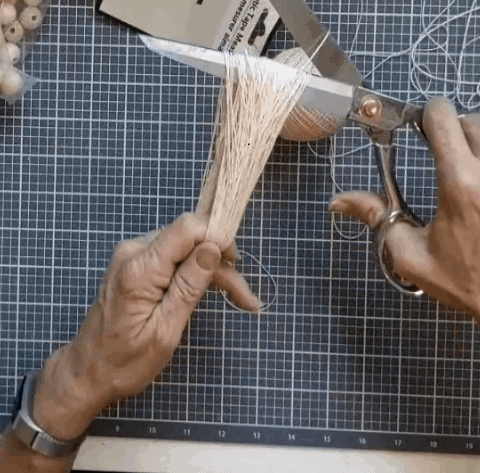
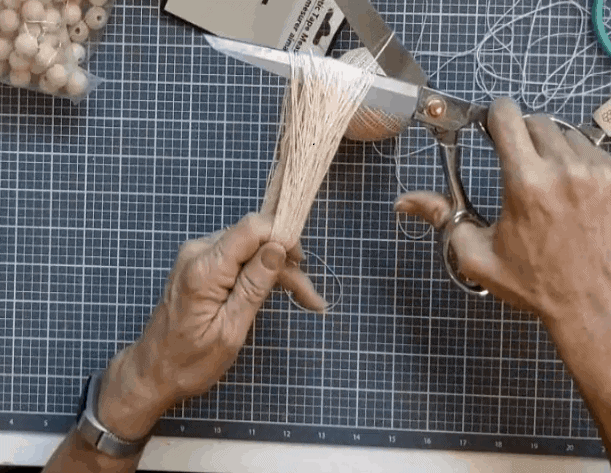
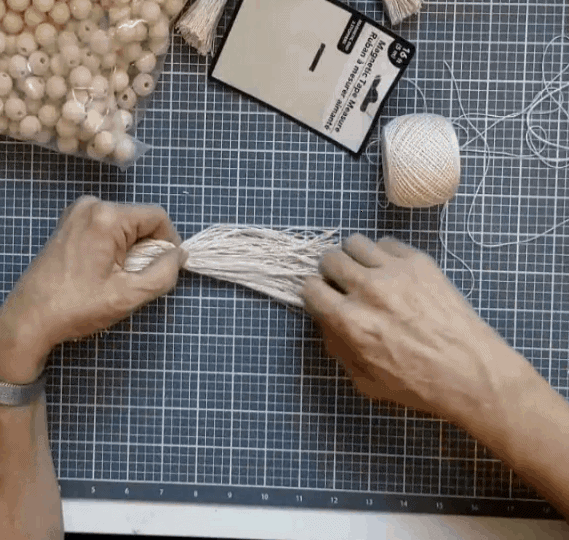
Slide the loops off of the cardboard, and at the opposite end from where you tied the knot, then cut the loops. It helps to have sharp scissors for this.
Step 5
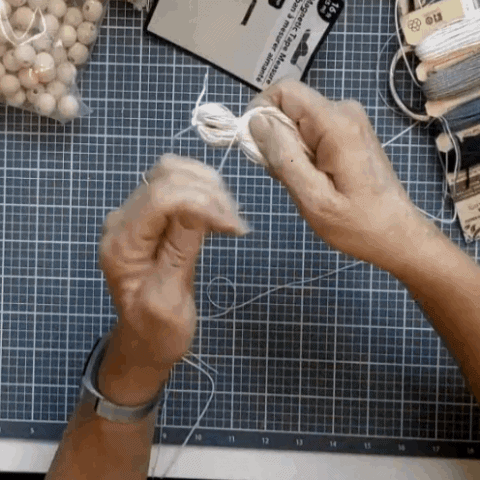
Now cut another piece of material about 2 feet long. Begin wrapping this around the group of strands that you created when you cut. How far down from the top depends on how you want it to look. I am doing mine about an inch down from the top. now just keep wrapping around until you have this part as long as you want it to be. Tie a knot and cut the end.
Step 6
Comb through the tassel with your fingers to coax out any strings that didn’t get cut. You could also use an actual comb for this, but I found my fingers worked fine.
Step 7
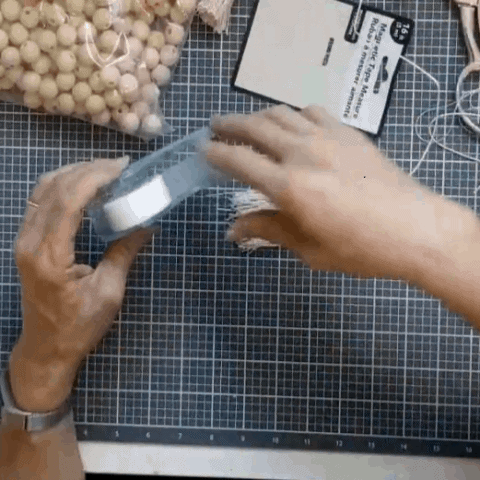
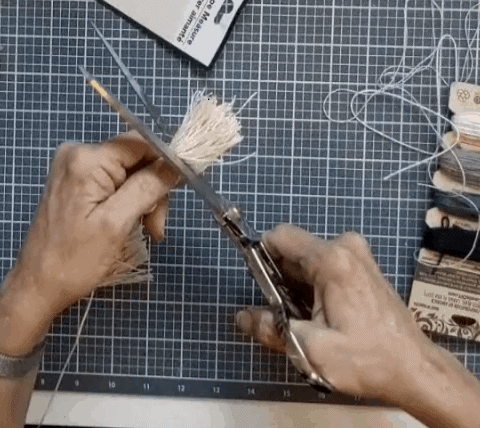
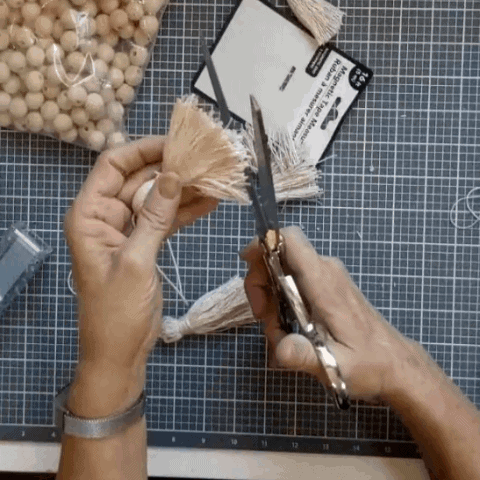
Tape around the bottom of the strings at the point that will make the tassel the length you want then cut just below the tape. This should give you a nice even tassel. Coax out the stragglers again with your fingers or the comb and trim them to the correct length.
Step 8
Comb through it with your fingers again to get any long pieces coaxed down and do a final trim.
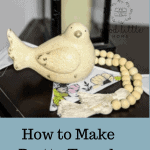
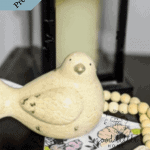
Now your tassel is ready to be attached to whatever you want. Isn’t it pretty? You can make them into decorations for gifts, earrings, tiebacks for curtains, or as I am using mine for just a cute farmhouse touch in my decor.
If you have enjoyed this post on How to Make Tassels, please share it on Pinterest. Don’t forget to subscribe to our Newsletter, like us on Facebook, and follow us on Instagram, or check out my YouTube Channel.
Till next Time…

How to make Pretty Tassels

Do you know how to make tassels? They are so pretty and can really dress up a plain piece of decor. They can be made into so may pretty things!
Materials
- Crochet Thread
- Cardboard
Tools
Instructions
Step 1
Figure out how long you want your tassel to be. Cut a piece of heavy cardboard to the length plus about an extra 2 inches. I happened to have a piece that I could use laying in front of me, so I grabbed it. Otherwise, I would have had to cut a piece of cardboard. You can see what I used in the next picture.
Step 2
Wrap your material (twine, yarn, etc.) around the cardboard. how many times you go around depends on how full you want your tassel to be, and how thick your material is. In my example, I went around(and around, and around) 150 times.

Step 3
Cut a piece of the material to about 8 inches. This will end up being your hanger. Slide the piece under the twine and slide it to the very top at the center of the loops. Now tie a tight knot around the loops. This piece is going to be your hanger when you are all done.
Step 4
Slide the loops off of the cardboard, and at the opposite end from where you tied the knot, then cut the loops. It helps to have sharp scissors for this.
Step 5
Now cut another piece of material about 2 feet long. Begin wrapping this around the group of strands that you created when you cut. How far down from the top depends on how you want it to look. I am doing mine about an inch down from the top. now just keep wrapping around until you have this part as long as you want it to be. Tie a knot and cut the end.
Step 6
Comb through the tassel with your fingers to coax out any strings that didn't get cut. You could also use an actual comb for this, but I found my fingers worked fine.
Step 7
Tape around the bottom of the strings at the point that will make the tassel the length you want then cut just below the tape. This should give you a nice even tassel. Coax out the stragglers again with your fingers or the comb and trim them to the correct length. 

Now your tassel is ready to be attached to whatever you want. Isn't it pretty? You can make them into decorations for gifts, earrings, tiebacks for curtains, or as I am using mine for just a cute farmhouse touch in my decor.