DIY Garden Pennant Banner and How-to Video


A Darling DIY Garden Pennant Banner
This Pennant Banner DIY is a video tutorial. The materials list and a transcript follow the video. I hope you will give my video a thumbs up! This banner would be so cute for an outdoor spring or summer party, it’s so dainty and cute.
Materials for Garden Pennant Banner
Transcript (not exact), and Headings have been added to help you find things.
Introduction to Pennant Banner
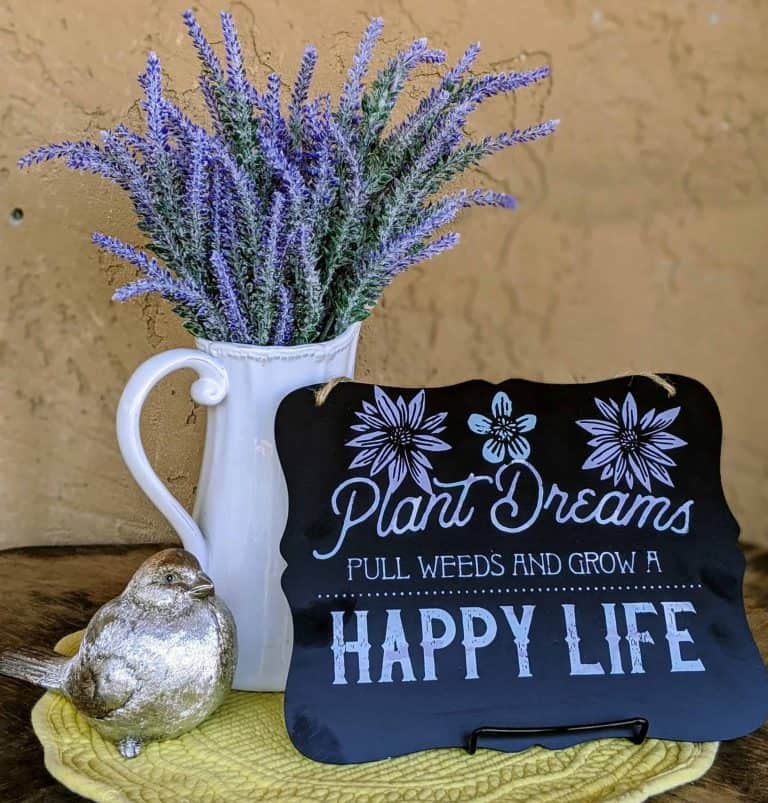
Well hello everybody. I am so excited about this craft that I’m doing today that I thought I would just jump on and do an impromptu live with you. I am doing a bee themed porch. This is going to be part of what’s out there. I made one and you can see how cute that is. All right I didn’t really make it so you could see how cute it is. I actually made it because like I didn’t want to make the very first one I ever did on a live, but isn’t it pretty?
Sticky Surface
So let’s jump in and I’ll show you how I made it. Chalk Contour does sell sticky mats for using on these but they’ve been out for a while. I have this Cricut fabric grip mat that I’m going to use to hold my banner down while I’m working on it. I’m just going to stick the banner to it.
Add fabric around edges
I’m skipping this one because I’m going to do a different pattern on that one and the transfer I want to use hasn’t come in yet so I’m going to skip to the third one and push that down. Okay because I’m working on a sticky mat I don’t want my transfer to stick to the sticky mat so I’m just gonna put some pieces of fabric beside this and to be perfectly honest I probably could do this just on my Chalk Couture mat. I think I don’t want this to slide around while I’m trying to work on it.
So like I said I’m just going to put some pieces of fabric on the side, and I have another piece of fabric there it is, In fact, I think I’m gonna cut some off of this so I can put it across the top too in case I need to when I lay this transfer down. Okay, now we are all ready to put the transfer down. I think though I want to do it the other way I want my pennant on top of my fabric. okay and this fabric banner, by the way, I got it at Amazon and when we’re done with the live I will go into comments and let you know how you can get it all.
Floral Border is the Transfer for the Pennant Banner.
So this is the transfer I’m using and it is a floral frame is what it’s called and technically you use it it was made to be used around an A size transfer so you could do a floral frame on the transfer, but it also works really well for this little project.
Line up the transfer, using Paste not Ink
So what I’m doing is trying to line this up there’s a little screen here and I don’t want that on my pennant banner, also because I’m doing fabric I did not fuzz this first. You don’t need to fuzz if you’re doing fabric and I’m just going to start. Oh and I’m using paste on fabric, not ink because I’m going to be doing a watercolor and I wasn’t really sure how that would work with ink, so I decided I would just use paste. I’m not going to be washing this anyway, it’s not like it’s a t-shirt or something that needs to be laundered.
Stir the paste well
As always I’m stirring my paste. Always always always give your paste a good stir before you get started. How is everybody can you hear this creaky chair you guys it’s like driving me nuts every time I move my chair creaks I’m going to have to ask for some assistance in this creaky chair category. You know what I just noticed this is going to end up solid black and I don’t want that, so I’m going to pull that up so we get more of the part that I can watercolor onto the fabric. Maybe even a little bit more. Okay, I can live with just that little bit of it on the fabric.
Make sure you have a nice stick from the transfer to the fabric and apply the paste
So I want to give it a really good rub even though it’s not ink, it is fabric so it will take the paste a little bit different than a hard surface. Let’s just grab a clean squeegee, and just like normal you just take a little bit of paste, you don’t want to go crazy with the paste, because it doesn’t take much all right? Then I’m going to remove my excess paste just like we always do, and I need a place to put this down. Okay, how about the lid? Here we go ready for the big reveal? Whoosh and there it is!
Do the same on the other side of the pennant banner
Okay, now I need something on the other side. I’m only going to show you guys one of these I’m not going to make you stay on this live and do like six more of them. We’re just gonna do this one on live, and you’ll see why. Okay? These take a while because we’re gonna be doing some hand painting on them, as well and a little bit of paste.
Okay I’m gonna, whoops you know what I see a spot I missed right there, it’s just a teeny-weeny little one but all right. I’ll pull the transfer and try not to get black paste all over it. There we go, and now I’ve got a water bath over here to the side that you cannot see, but I just threw the transfer into the water bath so that the paste doesn’t dry up in the screen while we’re working on the rest of it.
Why am I so messy?
It’s pretty just like that without even adding the watercolor to it, but we’re going to do some watercolor on it. So the first thing I’m going to do is dry it. I’ve got my cord stuck. Okay and now I can pull this stuff all off of it. That’s our canvas more or less, it’s actually cotton, but what we’re going to be working on with our watercolor. I’m gonna just go ahead and close up this black before I make a black mess all over everything else.
You know I watched other people do this, and somehow they’re not as messy as I am, but you know, good to know yourself. I know that I know that’s true I’m messy, so I always have paper towels at the ready so that I can wipe my mess before I spread it all over, it’s another thing that this little bottle is good for so you can get your hands wet, and grab your paper towel.
Mixing the watercolor from the paste.
Okay so now we’re going to do some watercolor painting and I have already mixed up these pastes so that you don’t have to watch while I do all the colors. I’m going to be using different colors for this panel of the pennant banner.
I’m going to use this yellow and I’m going to mix up some of my Morning Sky. I’ll do that so you guys can see this paste itself is a little bit thick. I think when you live in Phoenix in the summer even if it’s inside, it doesn’t really matter. It just dries out this paste, like crazy. Our humidity here is usually five percent or lower so the air is just so dry that it sucks the moisture right out of everything. All right so that’s good enough to use for what we’re doing, so I’m just going to take a little dollop of it and put it over here in my bowl.
Oops
Whoa, see what I mean about I’m messy? Thank goodness none of that got on my pennant banner panel! All right let’s clean up this little mess before we move on Its live folks, anything can happen. Okay so as I was saying, you put just a little in here, and then we’re gonna add put in two squirts of water, so we want this to be really thin. Like I said it’s watercolor so we want it to be almost translucent when it goes on to the fabric. Translucent my big word of the day, almost clear. See why I didn’t want you to have to watch while I did this with all these colors? It takes a while to stir it all, I try to be respectful of your time people, I try.
Start Painting
I was all ready to come on and introduce this project with my craft room being all abuzz with bee projects, but you know did I really say that? Yes, I really did, I really did say my craft room is all abuzz with bee projects. All right I think that’s good enough, and I just have water up here so I can rinse my brush between colors.
Zoom in closer
Here I’ll bring that down to where everything’s on camera. Okay so then it’s just like when you were in kindergarten. I’m just gonna paint the watercolor on. Do your best to stay in the lines, but I have a little trick I’ll show you when we’re all done with the painting part. If you have gone outside of the line, I hope my hand’s not blocking everything, it’s just I too I’m trying to stay in the lines. Can you see what I’m doing? Let me zoom this camera down just a little bit so you can see better what I’m doing. There you go it’s pretty light anyway because like I said, you want it almost, you know you don’t want the color to be heavy when you’re using watercolor.
Dry what you just painted
So everybody’s stuck at home on the three-day weekend or got plans? We’re not doing anything. I hurt my back this week so we’re just kind of doing easy stuff over the weekend, which is fine because I wanted to get this porch done. I’ll have lots of time to work on it. All right so that is the blue flowers, and I’m just gonna rinse off my brush. I’m thinking maybe I should dry those before I go further because I’m going to put my hand down on it when I’m trying to paint over there, I can see it coming so I think I’m just going to grab my dryer and dry.
How to fix out of the lines paint
Now I’m going to hold this up to the camera a little bit more, and you still can’t really see it but right here I’ve gone over the line with my blue, so I’m gonna dry it and then I’ll show you how to fix it when you do that. (Dog Barks) Oops, puppies awake. All right it is paste so it dries fairly quickly.
I have this sharpie oil-based paint marker, and it’s an extra-fine point, and I’m just going to go over the part that’s supposed to be black with that. Now you can’t really tell any different, um I want this little part to be darker too so I’m gonna go over it. If you really wanted to get crazy you could go over all of the black lines with your sharpie but I don’t really think that’s necessary, but the thicker lines if you got blue on them this is how you fix it.
Okay all fixed, you can’t even tell. See you can’t even tell where it was. Get it really close except I’m gonna get in there. You can’t even tell that it had the blue on it. Okay and there’s another little bit of blue there that I missed. I am cleaning that up before I drag something through it.
Clean brush between colors
All right so now I cleaned my brush, and I’m going to go ahead and do the yellow this is daffodil, is what the paste color is called. I’ve just thinned it out exactly like I did the blue. I almost feel like I need to bring that camera even closer yet. (Phone Rings ) Well, that’s interesting, sorry guys I didn’t think that the phone would be able to ring when I was using it as a camera, but now I know it can. So as I was saying it’s live anything can happen, the dog barks, the phone rings, the notification thing beeps, it’s my life and it’s full of interruptions. But hey I’m just going to craft on okay? Okay.
Dry again
All right yellow is done now and again I’m going to dry it real quick before I do anything else. Okay, that feels dry enough to move on and I am going to bring this camera even just a little bit closer because it really is hard to see with watercolor. All right and that is as close as I can get.
Watch for layers
I have some little flowers right here, and I think there’s one down here too. I think I want the flower to be on top of the leaf so I’m going to do the leaf first and then the flower so that the flower color is over the leaf. So I’m just gonna rinse off my brush, and this looks like it could use a stir. This color is Spring Zing. Okay so let’s go ahead and do the leaves.
Squeak, squeak like I said every time I move my chair squeaks. I don’t know if that’s being picked up or not but it is in my ears. I hear this chair squeak every time I move, okay I guess that’s something else I can put on my to-do list for the weekend, oil the chair.
Watch the edges but don’t stress
And on this, I’m only being careful not to go outside of the lines on the edges. I don’t care if I go over the lines on the leaf, not one little bit, get it as close as I can to that flower without getting it on it. Now I’m going to clean my brush, looks like I got a little bit of paste on there. I can probably wash it off but it kind of adds to the handmade ambiance, maybe I’ll just leave it.
Some Paste colors mix better, but they can all be used.
Okay, so I think I’m gonna use this one. It is called peony, and for some reason, it just doesn’t want to mix with my water as well as the other colors did. I tried to get this one to mix. I mean it does mix it does it will work it’s just that it seems thicker kind of lumpier than the other colors. We just have three teeny little flowers to do down here with this one, probably these are so small I’m gonna have to do some touch up with the marker. There’s no shame in doing touch up with the marker. If you have to, you have to, and I should have done these two little leaves in green While I had green open, but I’ll go back over them as soon as we’re done with this.
Okay pick up those other two little leaves and then we’ll fix it up with the marker, and we are done. Isn’t that pretty?
I just love doing watercolor with chalk transfers, it’s like my new favorite thing.
Keeping the brush fibers flat
Okay this brush keeps trying to fan out on me and I want it to stay flat so I keep trying to play with the edge to get it to go back flat since I’m working in such a teeny tiny little spot here. All right I’ll go ahead and dry it.
Zoom in some more, and fix some spots
You have to shake this every time you use it, okay so you’re pretty close but not close enough, I don’t know I’m gonna get as close up here as I can. I want you to be able to see it. Um so on those little pink flowers you can kind of see from that close, where I went over, where I went on the black lines that’s an outline of the flower. I’m just going back over those with my sharpie, and I missed one there. All right let’s get that one. You’ll find stuff like that when you’re going over it where you miss something. No big deal.
Okay then down here this one’s going to need a lot of outline on that flower because it’s over the top of that leaf. Then I just drew that line down and then up here on my yellow. I want to go over some of these edges too. This would probably work with any fine point sharpie. I’m sure it doesn’t have to be this painting kind, it’s just I started poking around in the craft room for something to use.
The funny thing is I’m a Sharpie addict. Like everybody I know knows that I’m a Sharpie addict. I have probably more Sharpies than anybody else in the world except for maybe the sharpie company themselves, and I could not find a fine point black sharpie in here, but I did have this. So I decided I would go ahead and use it,
Of course, if you decide to do your solid lines in a color that’s not black you’ll need to get a coordinating Sharpie.
Okay and I see some little spots down here in the green that I want to touch up with the sharpie.
Dog Barks
Also, it’s getting dark here in phoenix I need to run out and get my garden watered before it gets completely dark. (Dog Barks) Somebody else that lives here is supposed to be keeping that puppy occupied while I’m doing this so she doesn’t bark, but clearly he is not doing that job. I don’t know if you guys can hear her barking, but I can.
Put in the bee
Okay so now we’ve gone over all the edges. Hum, should we put a bee in it? I have a bee in this other one over here, and it is a bee themed porch. Oh let’s see whether or not I can find the bee transfer quickly, and we’re going to be using the bee transfers all week, so if you want to make this project you should probably get them. I will leave the information. I’m just going to put my little bee right here, and take a piece of tape because I don’t want his wings black, I’m going to do the rest of him in black.
Introduce Multitool
Back to my black paste, this is the tool you need for doing fine work, you can use a small squeegee, but this is so much nicer.
Okay so now we have our bee on a panel of our pennant banner. We should pull off this tape, and probably I should not have pulled the transfer yet. I got a little ahead of myself. All right put it back down, and I’m going back to the daffodil color for the wings, and it is the diluted one.
Touch up some detail on the bee
Okay, the little bee is done. I’m gonna dry him off. Squeak. All right, see if I can get his little abdomen having some of the yellow in it too. Okay, I’m gonna dry that off all right now. I’m going to take my little sharpie and I’m going to draw around these wings so you can see where they are because this yellow is so pale. There we go, and that my friends is it. Your panel of your garden pennant banner is complete
We are ready to go on to the next one, so it didn’t take that long to do, isn’t that pretty. I really really really like this, let me put it back where you can see it. I forgot I’ve got my camera zoomed, there you go. Anyway, I think it’s really pretty and I can’t wait to finish this pennant banner, and put it on my back porch. I will share it with you guys when the porch is all done. Have a wonderful night and I will talk to you soon.
I hope you will love your Garden Pennant Banner as much as I love mine. If you liked this project check out my Chalk on Terra Cotta project here.
If you have enjoyed this post please share it on Pinterest. Don’t forget to subscribe to our Newsletter, like us on Facebook, and follow us on Instagram, or check out my YouTube Channel.
Till next time…

DIY Garden Pennant Banner and How to Video

Super adorable banner from Chalk Couture supplies. Use it for outdoor Spring parties.
Tools
Instructions
From A Transcription of The Video Just the Steps
Sticky Surface
So let's jump in and I'll show you how I made it. Chalk Contour does sell sticky mats for using on these but they've been out for a while. I have this Cricut fabric grip mat that I'm going to use to hold my banner down while I'm working on it. I'm just going to stick the banner to it. 
Add fabric around edges
I'm skipping this one because I'm going to do a different pattern on that one and the transfer I want to use hasn't come in yet so I'm going to skip to the third one and push that down. Okay because I'm working on a sticky mat I don't want my transfer to stick to the sticky mat so I'm just gonna put some pieces of fabric beside this and to be perfectly honest I probably could do this just on my Chalk Couture mat. I think I don't want this to slide around while I'm trying to work on it.
So like I said I'm just going to put some pieces of fabric on the side, and I have another piece of fabric there it is, In fact, I think I'm gonna cut some off of this so I can put it across the top too in case I need to when I lay this transfer down. Okay, now we are all ready to put the transfer down. I think though I want to do it the other way I want my pennant on top of my fabric. okay and this fabric banner, by the way, I got it at Amazon and when we're done with the live I will go into comments and let you know how you can get it all.

So this is the transfer I'm using and it is a Floral Frame is what it's called and technically you use it it was made to be used around an A size transfer so you could do a floral frame on the transfer, but it also works really well for this little project.
Line up the transfer, using Paste not Ink
So what I'm doing is trying to line this up there's a little screen here and I don't want that on my pennant banner, also because I'm doing fabric I did not fuzz this first. You don't need to fuzz if you're doing fabric and I'm just going to start. Oh and I'm using paste on fabric, not ink because I'm going to be doing a watercolor and I wasn't really sure how that would work with ink, so I decided I would just use paste. I'm not going to be washing this anyway, it's not like it's a t-shirt or something that needs to be laundered. 
Stir the paste well
As always I'm stirring my paste. Always always always give your paste a good stir before you get started. How is everybody can you hear this creaky chair you guys it's like driving me nuts every time I move my chair creaks I'm going to have to ask for some assistance in this creaky chair category. You know what I just noticed this is going to end up solid black and I don't want that, so I'm going to pull that up so we get more of the part that I can watercolor onto the fabric. Maybe even a little bit more. Okay, I can live with just that little bit of it on the fabric.
Make sure you have a nice stick from the transfer to the fabric and apply the paste
So I want to give it a really good rub even though it's not ink, it is fabric so it will take the paste a little bit different than a hard surface. Let's just grab a clean squeegee, and just like normal you just take a little bit of paste, you don't want to go crazy with the paste, because it doesn't take much all right? Then I'm going to remove my excess paste just like we always do, and I need a place to put this down. Okay, how about the lid? Here we go ready for the big reveal? Whoosh and there it is. 
Do the same on the other side of the pennant banner
Okay, now I need something on the other side. I'm only going to show you guys one of these I'm not going to make you stay on this live and do like six more of them. We're just gonna do this one on live, and you'll see why. Okay? These take a while because we're gonna be doing some hand painting on them, as well and a little bit of paste.
Okay I'm gonna, whoops you know what I see a spot I missed right there, it's just a teeny-weeny little one but all right. I'll pull the transfer and try not to get black paste all over it. There we go, and now I've got a water bath over here to the side that you cannot see, but I just threw the transfer into the water bath so that the paste doesn't dry up in the screen while we're working on the rest of it. 
Mixing the watercolor from the paste.
Okay so now we're going to do some watercolor painting and I have already mixed up these pastes so that you don't have to watch while I do all the colors. I'm going to be using different colors for this panel of the pennant banner.
I'm going to use this yellow and I'm going to mix up some of my Morning Sky. I'll do that so you guys can see this paste itself is a little bit thick. I think when you live in Phoenix in the summer even if it's inside, it doesn't really matter. It just dries out this paste, like crazy. Our humidity here is usually five percent or lower so the air is just so dry that it sucks the moisture right out of everything. All right so that's good enough to use for what we're doing, so I'm just going to take a little dollop of it and put it over here in my bowl. 
Start Painting
Here I'll bring that down to where everything's on camera. Okay so then it's just like when you were in kindergarten. I'm just gonna paint the watercolor on. Do your best to stay in the lines, but I have a little trick I'll show you when we're all done with the painting part. If you have gone outside of the line, I hope my hand's not blocking everything, it's just I too I'm trying to stay in the lines. Can you see what I'm doing? Let me zoom this camera down just a little bit so you can see better what I'm doing. There you go it's pretty light anyway because like I said, you want it almost, you know you don't want the color to be heavy when you're using watercolor.
Dry what you just painted
So everybody's stuck at home on the three-day weekend or got plans? We're not doing anything. I hurt my back this week so we're just kind of doing easy stuff over the weekend, which is fine because I wanted to get this porch done. I'll have lots of time to work on it. All right so that is the blue flowers, and I'm just gonna rinse off my brush. I'm thinking maybe I should dry those before I go further because I'm going to put my hand down on it when I'm trying to paint over there, I can see it coming so I think I'm just going to grab my dryer and dry.
How to fix out of the lines paint
Now I'm going to hold this up to the camera a little bit more, and you still can't really see it but right here I've gone over the line with my blue, so I'm gonna dry it and then I'll show you how to fix it when you do that. (Dog Barks) Oops, puppies awake. All right it is paste so it dries fairly quickly.
I have this sharpie oil-based paint marker, and it's an extra-fine point, and I'm just going to go over the part that's supposed to be black with that. Now you can't really tell any different, um I want this little part to be darker too so I'm gonna go over it. If you really wanted to get crazy you could go over all of the black lines with your sharpie but I don't really think that's necessary, but the thicker lines if you got blue on them this is how you fix it.
Okay all fixed, you can't even tell. See you can't even tell where it was. Get it really close except I'm gonna get in there. You can't even tell that it had the blue on it. Okay and there's another little bit of blue there that I missed. I am cleaning that up before I drag something through it.
Clean brush between colors
All right so now I cleaned my brush, and I'm going to go ahead and do the yellow this is daffodil, is what the paste color is called. I've just thinned it out exactly like I did the blue. I almost feel like I need to bring that camera even closer yet. (Phone Rings ) Well, that's interesting, sorry guys I didn't think that the phone would be able to ring when I was using it as a camera, but now I know it can. So as I was saying it's live anything can happen, the dog barks, the phone rings, the notification thing beeps, it's my life and it's full of interruptions. But hey I'm just going to craft on okay? Okay.
Dry again
All right yellow is done now and again I'm going to dry it real quick before I do anything else. Okay, that feels dry enough to move on and I am going to bring this camera even just a little bit closer because it really is hard to see with watercolor. All right and that is as close as I can get.
Watch for layers
I have some little flowers right here, and I think there's one down here too. I think I want the flower to be on top of the leaf so I'm going to do the leaf first and then the flower so that the flower color is over the leaf. So I'm just gonna rinse off my brush, and this looks like it could use a stir. This color is Spring Zing. Okay so let's go ahead and do the leaves. 
Some Paste colors mix better, but they can all be used.
Okay, so I think I'm gonna use this one. It is called peony, and for some reason, it just doesn't want to mix with my water as well as the other colors did. I tried to get this one to mix. I mean it does mix it does it will work it's just that it seems thicker kind of lumpier than the other colors. We just have three teeny little flowers to do down here with this one, probably these are so small I'm gonna have to do some touch up with the marker. There's no shame in doing touch up with the marker. If you have to, you have to, and I should have done these two little leaves in green While I had green open, but I'll go back over them as soon as we're done with this.
Okay pick up those other two little leaves and then we'll fix it up with the marker, and we are done. Isn't that pretty?
I just love doing watercolor with chalk transfers, it's like my new favorite thing. 
Put in the bee
Okay so now we've gone over all the edges. Hum, should we put a bee in it? I have a bee in this other one over here, and it is a bee themed porch. Oh let's see whether or not I can find the bee transfer quickly, and we're going to be using the bee transfers all week, so if you want to make this project you should probably get them. I will leave the information. I'm just going to put my little bee right here, and take a piece of tape because I don't want his wings black, I'm going to do the rest of him in black. 
Introduce Multitool
Back to my black paste, this is the tool you need for doing fine work, you can use a small squeegee, but this is so much nicer.
Okay so now we have our bee on a panel of our pennant banner. We should pull off this tape, and probably I should not have pulled the transfer yet. I got a little ahead of myself. All right put it back down, and I'm going back to the daffodil color for the wings, and it is the diluted one.
Touch up some detail on the bee
Okay, the little bee is done. I'm gonna dry him off. Squeak. All right, see if I can get his little abdomen having some of the yellow in it too. Okay, I'm gonna dry that off all right now. I'm going to take my little sharpie and I'm going to draw around these wings so you can see where they are because this yellow is so pale. There we go, and that my friends is it. Your panel of your garden pennant banner is complete
Notes
This card was created from taking parts of the transcription and putting them into a How-to format.